
Today, iPhone users are treating their devices more like mini-computers than phones. You, along with more than two-thirds of the population, use smartphones as an extension of the workplace. Whatever your vice or vocation, you probably have the apps and data to support it — a professional notetaker for the business-oriented, a sound engineering tool for the musically talented, a journal for the soft-hearted and a grocery list for the homemaker.
Plus, that doesn’t include the texts or contacts you interact with on a daily basis, whether casual or crucial to your life. The calendar with all your weekly appointments is likewise major in keeping everything running smoothly.
What happens if you lose all your information? While it would be tragic, it doesn’t have to be hopeless. Just like any other person with important information, you have a personal responsibility to protect your data, in particular your iPhone, from any irreversible loss.
The Benefits of Backing Up Your iPhone
With great technology comes great risks. Smartphones are specifically meant for the purpose of being an extra carry-on that can accompany us through both the trivial and vital tasks that we oversee during our day. On a typical day, we are lucky to avoid many common accidents that can occur. On a bad day, a small misfortune could jeopardize the state of one of the personal accessories we hold dear, like an iPhone.
About 41 percent of data breaches are credited to incidental disclosure of personal information, merely by transferring files. Someone malicious could acquire your personal information, and you might not have access at all. You’re also three times as likely to fall victim to mischievous clickbait on a mobile device than on your computer. Even without any technically experienced masterminds behind a malevolent scheme, it wouldn’t be incredibly difficult for someone to look over your shoulder, memorize your PIN and attempt to steal your phone at a later time.
Backing up your iPhone is the best way of ensuring you’ll never lose all your data at once, at least not really. Depending on the platform you use to do it, you can learn how to backup your iPhone’s contacts, pictures and settings — among other things. Besides creating the iPhone backup itself, you’ll have an additional location to access photos, videos or other media.
The process is simple for most. Once you have a backup, you can also easily restore that backup to a new iPhone or your old one if necessary. Doing regular backups of your iPhone is key to maintaining some security with your most fundamental assets.
Where to Backup Your iPhone
You must decide where the best place is to backup your iPhone before the actual backup takes place. Naturally, most iPhone users will initially think to use iCloud or iTunes. Unfortunately, since late 2019 iTunes has been dismantled and dispersed into several different content libraries for newer Mac OS’s. Of course, you can still backup an iPhone on your computer without iTunes. But on a Mac, you’ll have to use Finder instead. These options work especially well if you already have a Mac laptop or desktop.
An affinity for Apple iPhones is not parallel to an affinity for Mac computer. It does, however, limit your options a bit when it comes to making a backup. Without a Mac, you won’t be able to do an iCloud backup, but there are other options. The iTunes application is oddly still available for PC computers. A variety of third-party applications are also available on PC computers and Mac computers that offer the same or similar features as the standard iPhone syncing programs.
iCloud Backups
Backups via iCloud are considered to be the most convenient because there are no cables or plugs involved. Backups are saved in the cloud. Encryption is automatic. Your first 5GB of cloud storage is free. After that, you can have up to 2TB of storage — but it won’t be free. You can initiate manual backups and use the backups you’ve made already, as long as there’s a Wi-Fi connection. All you need to get started is an Apple ID and Wi-Fi.
iTunes Backups
Connecting your iPhone to your PC computer will automatically backup your device if you have iTunes installed — this makes iTunes almost just as convenient as iCloud. However, one inconvenience is that there will be cables involved, particularly the lightning-to-USB cable you use to charge your iPhone.
The main advantage is that using your computer means more storage will be readily available, and at no added cost to you. Computer backups via iTunes also don’t save all your data, only the data that hasn’t been backed up with iCloud. You might find this helpful in avoiding duplicate data, but you need to be certain of what you’ve actually backed up once the process is complete.
Finder Backups
Finder essentially works the same way as iTunes. The only difference is that you’ll find it on a Mac with the Catalina OS or newer. The interface is roughly the same too. The same pros and cons apply here — you have to use cords, but there is more storage available.
Third-Party Backups
Using an online storage solution like Google Drive or Dropbox is usually a cheaper option than iCloud. Alternatively, you can install a computer application that backs up data directly to your internal storage. Because of software limitations set by Apple, not everything always gets transferred when you use third-party applications to sync data from an iPhone.
The majority of the time, only media and contacts are backed up. Some people prefer this because it limits how much space gets eaten up by iPhone data. Since each third-party backup and restoration will differ to some extent — and there are many available — it’s best to just review standard backup and restore procedures for iPhone and leave everything else to the guides of whichever third-party program you may choose.
How to Backup Your iPhone
Now that you’ve decided which platform to backup your iPhone with, you can finally back it up. Completing an iPhone backup shouldn’t take too long, but that’s dependent on how much you plan to backup. As a safety precaution, you should make sure you have a few hours of free time, so you won’t need to rush anything.
You should also backup your iPhone to at least two different storages. For example, one can be cloud storage, and the other can be on your computer. While it’s practical to know where you’re able to backup your iPhone data in the first place, storing your data in more than one place at a time is a fail-safe method to protect you from total data loss.
To backup your iPhone, follow these step-by-step guides:
Using iCloud
To backup your iPhone using iCloud:
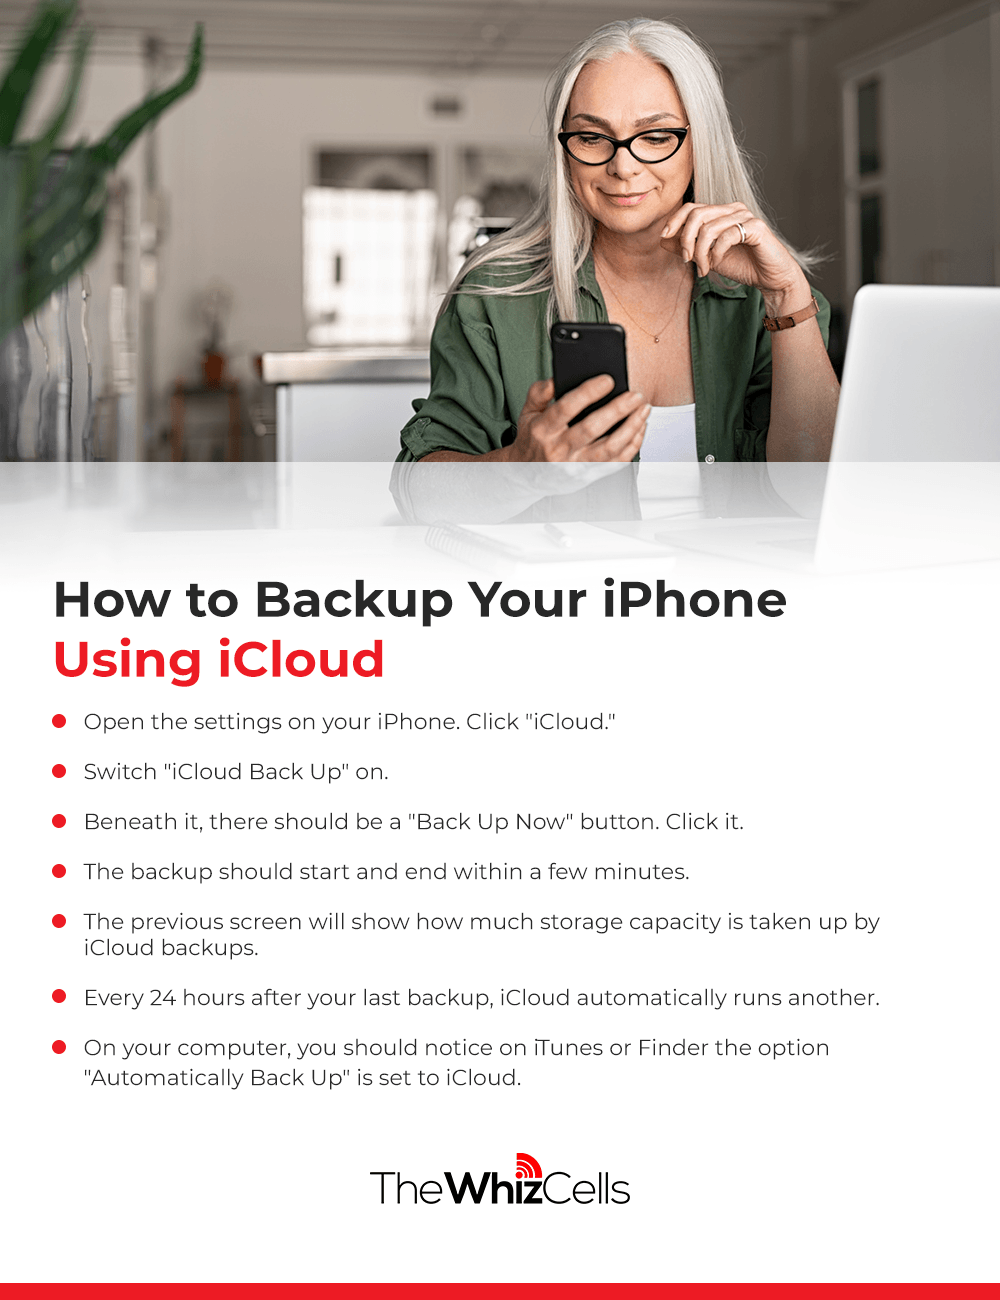
- Open the settings on your iPhone. Click “iCloud.”
- Switch “iCloud Back Up” on.
- Beneath it, there should be a “Back Up Now” button. Click it.
- The backup should start and end within a few minutes.
- The previous screen will show how much storage capacity is taken up by iCloud backups.
- Every 24 hours after your last backup, iCloud automatically runs another, so long as your iPhone is connected to Wi-Fi and charging while your screen or phone is off.
- On your computer, you should notice on iTunes or Finder the option “Automatically Back Up” is set to iCloud.
Using iTunes
In order to backup your phone using iTunes:
- Navigate to the Microsoft Store or the Apple website to download and install iTunes to your PC if you don’t have the application yet. Finder is pre-installed on Mac computers.
- Connect your phone to your computer and launch either iTunes or Finder using your charging cable.
- There may be a pop-up asking you if your computer is allowed to access the information on your iPhone. Click “Continue,” or whatever synonymous option appears. You won’t see either this pop-up if you’ve synced your iPhone with iTunes before.
- Unlock your iPhone. You’ll see a prompt asking you if it’s okay for your computer to access your iPhone data. Click “Trust.”
- After the program starts, the icon for your phone should appear in the top left corner of the program. Click it.
- The iTunes screen in front of you should have a section entitled “Backups.”
- Select “This computer” — this means your backup will be saved internally as opposed to the cloud.
- You’ll see the option to encrypt your iPhone as well. The encryption will backup other data like Wi-Fi settings, online history and health data.
- Check this box to password-protect your data in the case that someone else tries to obtain it. As you would expect, you will need to remember the password you provide.
- Enabling encryption should start the backup.
- Otherwise, click “Backup Now” on the right side.
- Wait for the backup to finish before disconnecting anything from your computer.
- You should see a pane for “Latest backups.” Here, you’ll see your most recent backups. The timestamp will have the date and time of your last backup.
Using Finder
To backup your iPhone using Finder, follow these steps:
- Connect your iPhone to your Mac using your charging cable.
- Locate and open Finder on your desktop.
- On the left side, there should be several headers or sections labeled “Favorites,” “iCloud,” “Locations” and so on. Navigate to “Locations” and click the one corresponding to your iPhone.
- Pop-ups should appear both on your phone and computer, asking if they can trust one another. Allow it do so by clicking “Trust.” Enter your passcode where applicable.
- A number of tabs should appear on your screen. Make sure you have “General” selected.
- First, under “Backups” choose whether you want your data to be backed up to iCloud or your Mac.
- Check the box for encryption if you would like to encrypt your local backup.
- Click “Back Up Now” when ready. The other buttons should gray out if your backup has started successfully.
- After completion, the buttons should become available again, and the current date and time will be indicated with “Last backup on this Mac.”
How to Restore Your iPhone Data After a Backup
Backing up your iPhone is a conservation method to prevent any loss of digital data, even if you may have lost the physical phone. It might turn out that you may never need to use a backup because you’ve kept your iPhone safe and sound all along. On the other hand, if something disastrous did happen to your phone and you’ve backed it up properly, you have the means to restore any data you may have lost.
Restoring From iCloud
To restore your iPhone with iCloud:
- Go to your iPhone settings.
- Navigate to “General,” then “Reset.”
- Click “Erase All Content and Setting” — doing this will erase all the data on your iPhone, so only do restores if entirely necessary.
- A pop-up will appear on your iPhone screen. Click “Backup Then Erase” if you need to create a new backup first. Otherwise, click “Erase Now.”
- There will be a prompt for your passcode. Enter it and then click “Erase iPhone” twice.
- Click “Start Transfer” on the next screen. Then choose “Restore from iCloud Backup” under “Apps & Data.”
- Sign in to iCloud by entering your Apple ID and password.
- Click the backup you wish to restore when prompted to “Choose Backup.” Tap “Show All Backups” if you initially don’t see your desired backup.
- Choose which settings you want to restore.
- Now your iPhone will be restored and restarted.
- After restarting it, sign in and your apps and data will be installed.
Restoring From iTunes
To restore your iPhone from iTunes:
- You’ll need to disable the Find My iPhone feature on your iPhone to restore your iTunes backup.
- Go to the settings on your phone.
- On an older iPhone iOS, locate the “iCloud” tab.
- Near the right side on the bottom, switch off “Find My iPhone.”
- On iOS 13 or newer, locate “Find My iPhone” — this should bring you to a new screen.
- Click “Find My iPhone.” Enter your Apple ID password and press “Turn Off.”
- Now that the “Find My iPhone” feature is enabled, start by using the same laptop you stored your original backup.
- Connect your iPhone to your computer using your charger cable.
- Click the icon for your phone in the top left corner.
- Under “Backups” to the right, there should be a button labeled “Restore Backup.” Click this.
- Select the correct backup you intend to restore by searching with the drop-down arrow for the corresponding date and time. The most recent backup is selected by default.
- For the next pop-up, ensure that your iPhone is selected with “iPhone Name.” Click “Restore.”
- Do not disconnect your iPhone until the restoration is complete.
Restoring From Finder
To restore your iPhone with Finder, follow these steps:
- Connect your iPhone to your Mac with your charging cable.
- Start up Finder.
- Go to “Locations” on the left side. Select your iPhone.
- Have the “General” tab selected.
- Navigate to “Backups” and click “Restore Backup.”
- A pop-up should appear, allowing you to select which backup you wish to restore.
- Using the drop-down area, select the appropriate backup by date and time. Click “Restore.”
Buy and Sell Used iPhones With The Whiz Cells

New phones come with advanced and improved-upon features that can serve you more favorably in the future. That’s why backing up your phone isn’t always in preparation for some random event resulting in the dreadful loss of personal data. Sometimes, you backup your phone simply because you want a new one and want to maintain all your mementos and essentials.
What’s perhaps just as important as backing up your old phone and getting a new one, is recycling responsibly. All cellphones, including iPhones, are made of hazardous waste materials. A cursory act like throwing your cellphone in the garbage can amount in more e-waste than you might imagine.
At The Whiz Cells, we believe in keeping electronics out of waste bins and landfills as long as possible — and we’re doing it by putting money in your pockets. Have an old or unwanted phone on your hands? The Whiz Cells can give you swift payment and free shipping to get your used phone to us. Together, we can help the planet and your wallet, and you won’t lose any contacts along the way.
Sell Your Device